Google Actions & MQTT : Part 1
Finally I have a topic to write …
Its summer here, and I have a regular old dump fan. The lazy me has been thinking of ways to switch on the fan without getting up!!! Recently I bought few ESP relays to play with. Now I thought this is the perfect use of those ESP relays. My idea was to install tasomta firmware and use google home to control those relays.
My idea looks something like this..
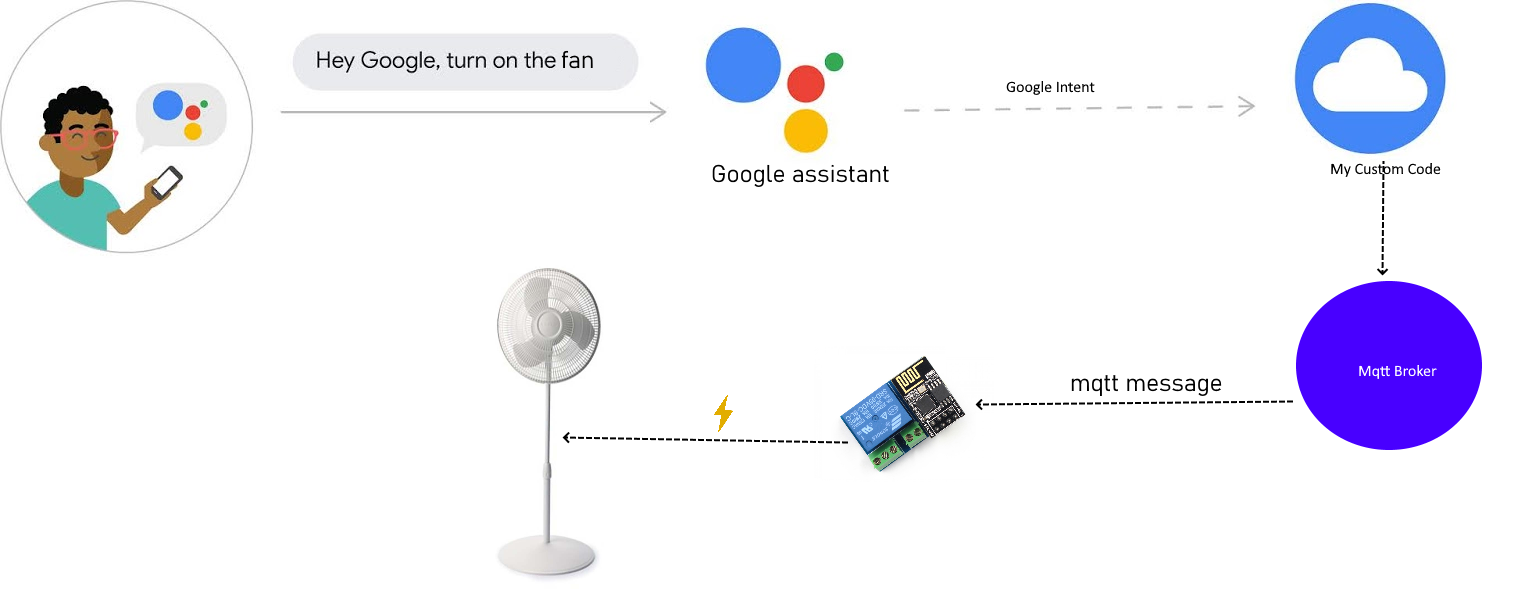
So the google assistant would talk to my custom app\website and then it will connect to my mqtt broker. The mqtt broker should then convey the message to the relay and relay in turn would turn on or off the fan.
So first things first..
How do we get the ESP relay to talk MQTT?
This was easy, tasmota had everything I was looking for. The installation was easy, followed their instructions and used Tasmotizer to install tasmota into the esp-01.
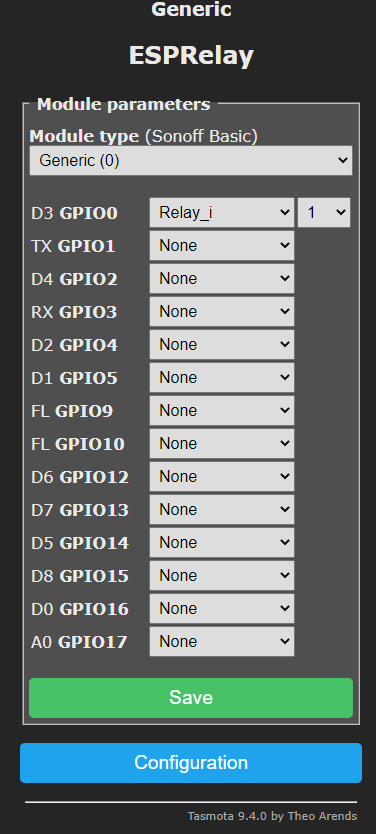
The only tricky part was figuring out which GPIO pin was used to control the relay. This diagram helped and figured out it was GPIO 0. So in the module configuration I chose Generic(0) as the Module type and assigned GPIO 0 to the relay. The module I have has the inverted signal for the relay, so used the Relay Inverted option (Relay_i) . I verified this by toggling the toggle button and heard the relay clicking.
Once that was done we now its time to enable enable mqtt. For this go to the Configuration --> Configure MQTT menu. Assuming we have the mqtt broker setup (mine was running as a docker image) input the mqtt broker hostname and port. And credentials if you have any.
We now have to name the topic. This is mqtt topic, tasmota client would be listening to. So make sure to give it a meaningful name so that we can identify this relay uniquely. I named mine BedRoom2Fan, since it is the fan in my second bedroom.

We can test our esp relay mqtt by sending "ON" message to the topic "stat/BedRoom2Fan/POWER". I used mosquitto_pub to publish the message.
mosquitto_pub -h mymqtt.local -t "cmnd/BedRoom2Fan/Power" -m "ON"
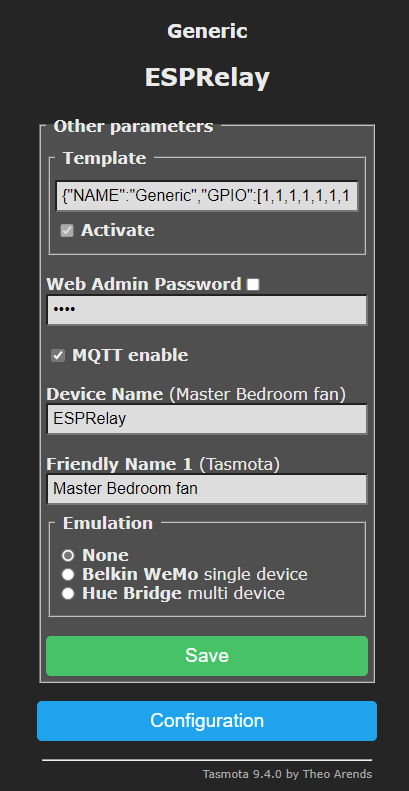
We can also rename our relay module and give a friendly name in the "Configure Other menu"
Now that we have the relay responding to mqtt messages we can now try out the google actions.
Google Actions
We can now focus on google actions and how we can make it to send mqtt messages. In theory when we speak to google assistant it uses contextual information (google calls this Home Graph) and finds out which device we are talking to and then issues a request to that corresponding device. you can read more here on the google documentation website.
My intention was to create a web app which the google home or assistant can call and that website will in turn convert the user requested action to mqtt messages, in my case switching on and off the fan. I am a big fan of docker and selfhosting so I want to keep my code\app in my local docker hosting environment and just expose the url to the internet so that google assistant can make the call.
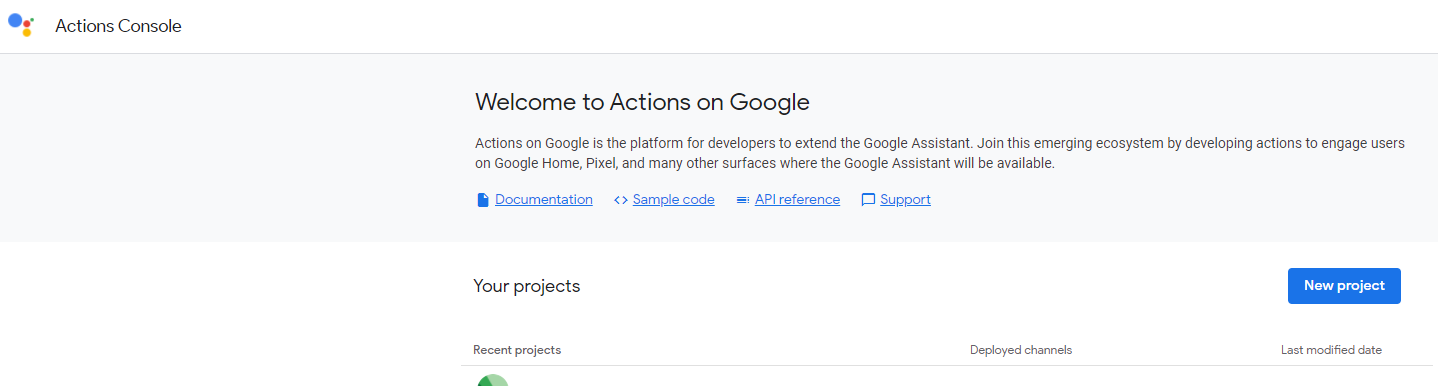
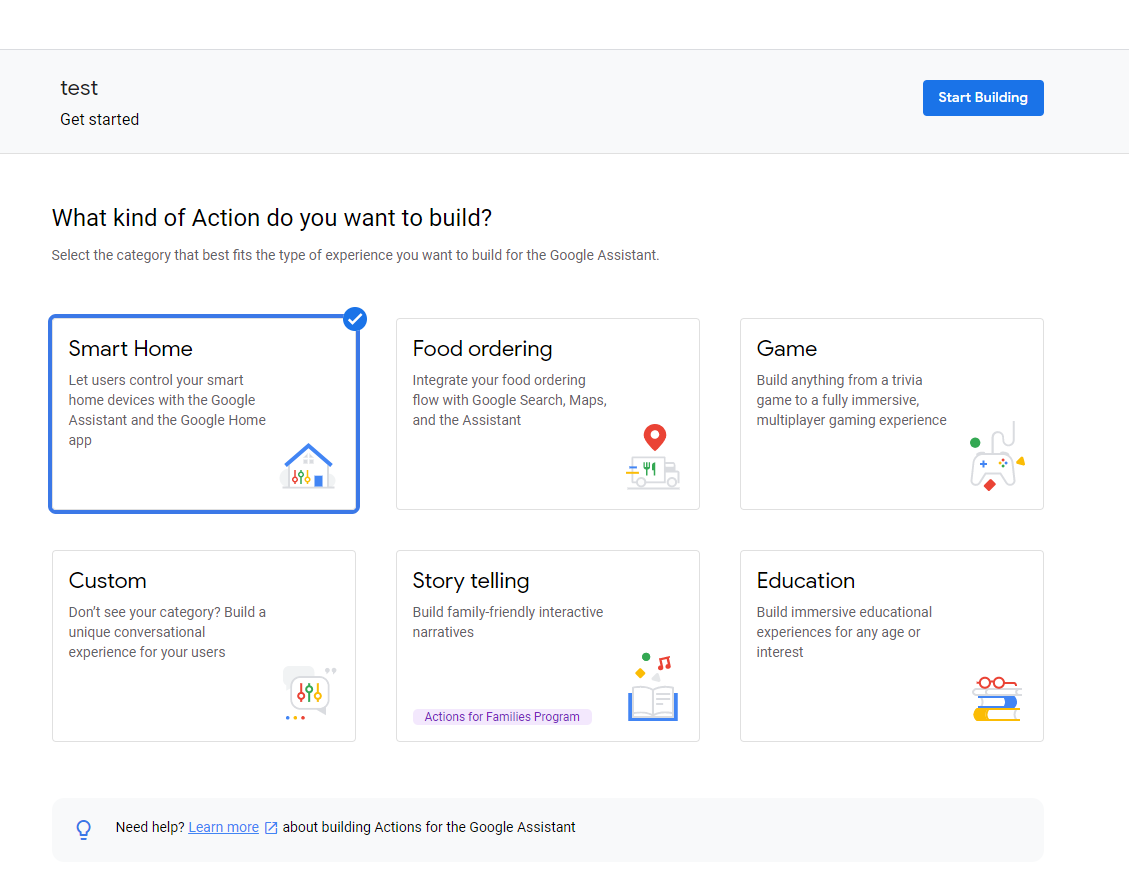
Reading the google documentation didn't get me any further. They had so may new terms like fulfillment, intent, home graph etc., which I was not familiar with and was confusing at first. Also the code examples google provided was confusing and used so many components like firebase etc. So I thought the best way is to try figure this our is by doing it. So I went to google actions console and created a project.
Creating Actions
Named the project with a meaningful name "test"!! and then it asked what type of project I wanted to create. Here I choose "Smart Home" since we would be building a smart device which would be part of the "Smart Home" eco system.
Once we click start building it would ask the name of the project. You can give a meaningful name. This is not the name we use to control our devices. This would be shown when we link the device account in google assistant which we will see later.
After naming the project we just have two more steps. First is to set up the fulfillment url and second is to specify how your google account should be linked with your device basically authentication.
Lets first look at what fulfillment URL is. We can set the fulfillment URL from the actions link on the left side.
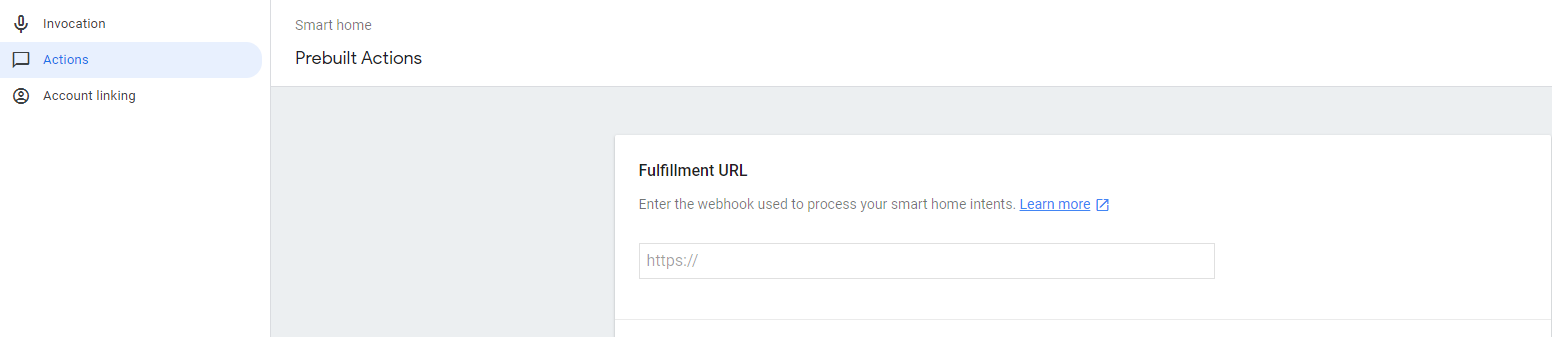
What this URL does is that, it allows Google actions to make a post request with a predefined json object. This action google calls as intent. So in another words when we asks google to turn on the fan, google does a post request with a json object in its body to the fulfillment url. We will look at the definition json object or intent later. So one we have the app ready we can expose that it to internet and give the url here in the google actions console as the fulfillment url.
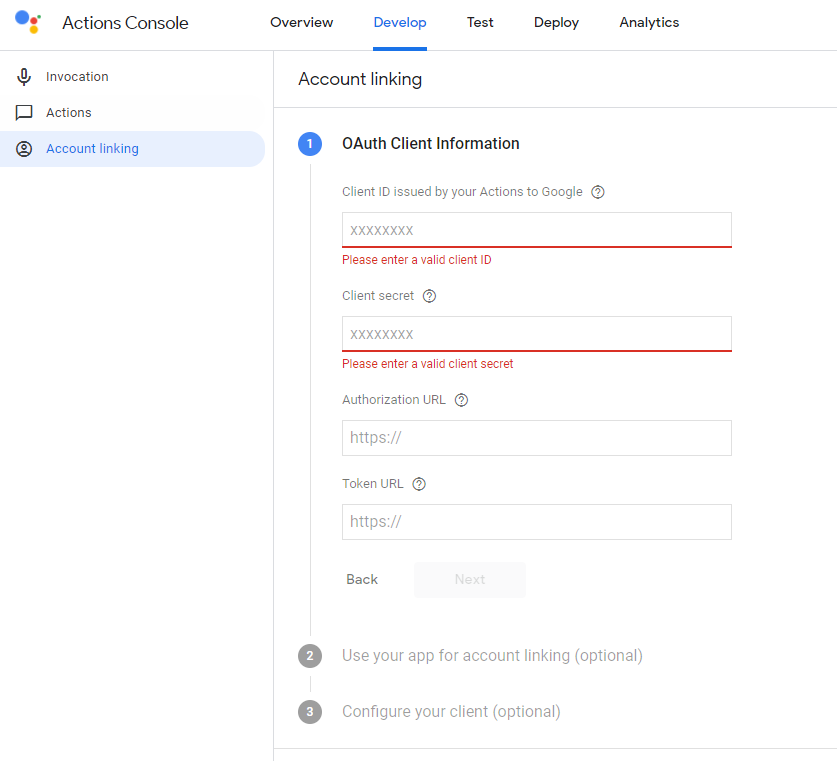
Account Linking
The next part of creating an action is to setup the account linking. This is where we setup the client identifiers and the authorization urls for OAuth 2.o. The authorization URLs would be from our application. The Client Id and secret is send as part of the authorization request and can be use to verify and ensure that the calls are coming from google. We will take a deeper look at this when we start discussing our app code.
Google Intents
Lets now look a deeper look at what these google intents are. The google documentation is here. I found it hard to understand what they where talking about initially. But after reading though the documentation a couple of times and looking at the code samples it became clear that intents are post requests to the fulfillment url with a predefined JSON payload which determines the type of indent. This understanding gave me the confidence that we can build a custom website to support the intent and translate them to mqtt messages.
There are four types of intents.
- SYNC 🠊 This call is issued to get the list of devices
- QUERY 🠊 This call is issued to get the status of each device(s)
- EXECUTE 🠊 This call is issued to execute the user action (for eg "Turn on the fan")
- DISCONNECT 🠊 This call is issued when you unlink a device.
As an example the sync post request would have a payload looking like this
{
  "requestId": "ff36a3cc-ec34-11e6-b1a0-64510650abcf",
  "inputs": [
    {
      "intent": "action.devices.SYNC"
    }
  ]
}In Part 2 we will look at the code which will respond to google intents and convert user actions to mqtt messages.